 Table of Contents
Create Credential using O-Auth v2
O-Auth v2 is an open standard for authorization that allows you to grant third-party applications access to their accounts without sharing passwords. This type of user authentication is more secure and is used for social media logins, such as using your Facebook or Google account to access a website.
For integrations that support the O-Auth v2 authentication type, you must authenticate on behalf of the client application and grant the requested permissions.
In the task below, we have created client credentials for the Adobe Sign API, which uses O-Auth v2 authentication.
To create credential using O-Auth v2
- Go to Credentials > App Credentials dashboard.
- Click +Create Credential.
- In the Add Credentials dialog, add the following information:
- Name: Enter a specific name to the integration.
- Description: Enter a brief description outlining the purpose of the integration.
- Integration: Select the integration for which the credentials are being created.
- Authentication Type: Select the authentication type as O-Auth v2.
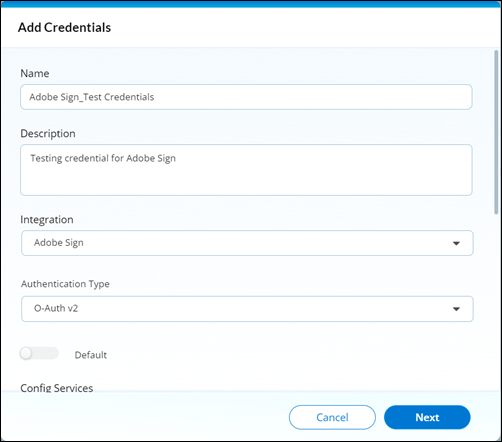
- In the Config Services section, add the following information:
- Token Validation Service
- User Id Mapper Service
- Action Call back Parser Service
- Webhook Parser Service
- Webhook Event Verification Service.
- Click Next. The advanced settings for Add Credentials are displayed.
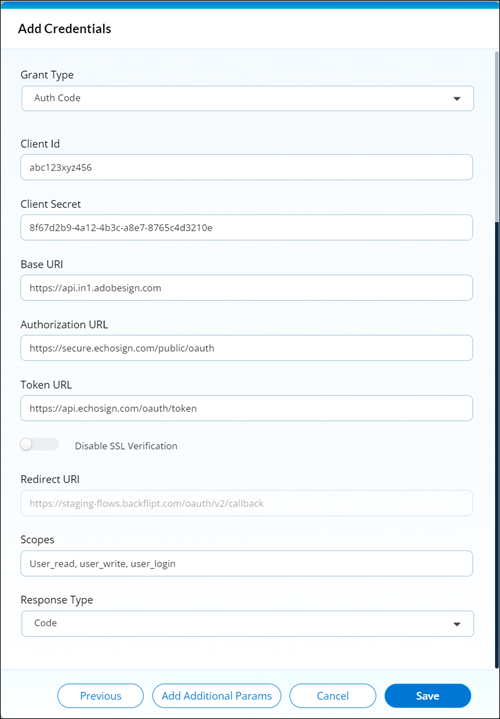
- In the Add Credentials dialog, add the following information:
-
Grant Type: Select the grant type from the following options:
- Auth Code: Use to authorize and obtain an access token from the authorization server.
- Password: Use to authorize and acquire an access token from the authorization server.
- Client Credentials: Use to authorize the client ID and client secret and obtain an access token from the authorization server
- Client Id: Enter the client ID that was issued to your application by the integration.
- Client Secret: Enter the client secret that was issued to your application by the integration.
- Base URI: Enter the base URI of the integration's API.
- Authorization URL: Enter the URL that will be used to obtain an authorization code.
- Token URL: Enter the URL that will be used to exchange an authorization code for an access token.
- Redirect URI: Enter the URL that will be used to redirect users after they have authenticated with the integration.
- Scopes: Enter the scopes that your application needs to access the integration's API.
- Response Type: Select the code or token type of response that you expect from the authorization server.
-
Grant Type: Select the grant type from the following options:
- If required, in the Add Authorization Params, Add Token Params, Add Token Header Params, Add Config Params enter the details.

- Click Save. After the credential is saved, the App Credentials dashboard shows the newly created credential.